How to Welcome and Care for a Chick
Pay Attention to Temperature and Humidity
When welcoming a young chick, the urge to handle and bond with it can be strong, but excessive stress should be avoided. Patience is key; begin by creating a quiet and safe environment.
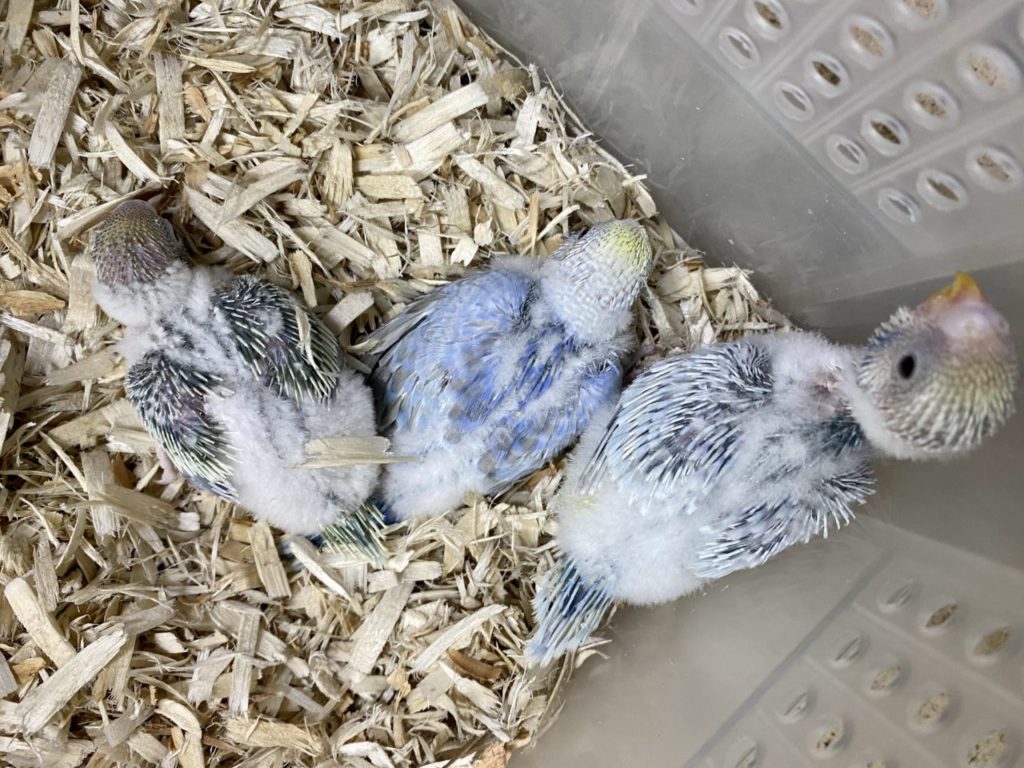
A chick that has just been welcomed alone lacks the warmth of parent birds or siblings. The first priority is to maintain warmth. A transparent rearing case, such as an acrylic or insect terrarium, is ideal. Line the bottom with tissue or small animal wood chips, avoiding fabric that could pose a risk of threads wrapping around the chick. The optimal temperature for raising a chick is between 26–30°C. If using air conditioning, make sure to monitor the temperature even during the summer months.
The appropriate humidity level is 60–70%. Regularly check the humidity and temperature, and to reduce stress outside of feeding times, cover the case with a light-colored towel to keep it dim.
Building Resilience to Stress

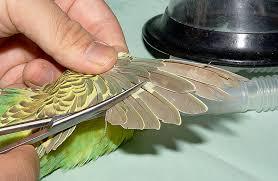
Clipping the primary feathers, known as “clipping,” is sometimes done at pet shops for chicks. This is especially useful when feeding multiple chicks at once, as un-clipped birds may fly around unpredictably. However, if you’re keeping the chick at home, clipping isn’t strictly necessary.
While clipping limits how far a chick can fly, reducing the chance of escape, it also increases the risk of being caught by predators like cats or crows if they do escape. Moreover, clipping can put a strain on their legs, potentially causing injury. Before deciding to clip, carefully weigh the pros and cons based on your home environment.
Socialization During Chick Development
The first eight weeks of a chick’s life are critical for developing social skills, which is a role the owner must take on. Begin by changing the layout of the cage and introducing different toys to help the chick adapt to various environments. Once the chick has grown somewhat, allow it to explore different areas of your home outside the cage.
Encourage social interaction by sharing care responsibilities with family members and inviting friends over. Also, consider taking the chick on short outings to prepare for vet visits in case of illness. By developing social skills, the chick becomes more resilient to stress, reducing the likelihood of behavioral issues such as biting or feather plucking.
Feeding the Chick

What You Need for Feeding
Until the chick is ready for its new cage, it will need to be fed with a mixture of millet and powdered food. While you can make your own millet mix, doing so in small batches can be difficult and may not last long, making store-bought millet a convenient option.
Essential items for feeding include:
- Store-bought millet (or hulled millet)
- Powdered food (formula)
- A container and spoon
- Hot water
You may also need liquid calcium or baby bok choy.
How to Prepare the Feed
- In a small container, combine equal parts millet (or hulled millet) and powdered food, then add hot water (around 60°C).
- Stir well to avoid lumps and let it sit for about 5 minutes to soften. In winter, you may keep it warm using a double boiler.
- If using liquid calcium or mashed baby bok choy, add them at this stage. Ensure the feed is at about 40°C when giving it to the chick. If it’s too hot, it could burn their crop, and if it’s too cold, they may not eat well. Aim for a temperature similar to bath water.
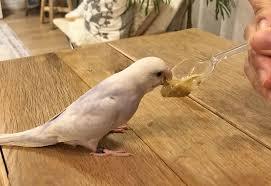
- When feeding, hold the chick in your hand and gently move the spoon back and forth to make it easier for the chick to eat.
Tips for Effective Feeding
Feeding a hand-tame chick is a delightful experience for owners. While you can take your time and use your own methods, consider the following tips for effective feeding:
When the feed runs out, use your index finger to push some feed toward the chick so it can access it. Stop feeding when you see the crop swell significantly. As the crop fills up, you’ll notice a change in the pitch of the chick’s chirping; use this as a guide.
Chicks will vocalize when they’re hungry. To make feeding easier, bring the spoon to the chick at a slight upward angle, about 45 degrees. This way, the chick will bob its head and chirp excitedly while eating. Mimicking the movements of a mother bird with the spoon can encourage the chick to eat even more.
Feeding Intervals
Feed the chick whenever it vocalizes for food, typically every two hours, totaling about four times a day. If you’re away for work or school during the day, you can still adequately care for the chick by feeding it in the evening.
Timing for Cage Introduction

Generally, budgerigar chicks leave the nest around 35 days old. However, when adopting from a pet shop, you may not know the exact age.
The right time to introduce the chick to its cage is when it starts flapping its wings inside the carrier. This indicates it’s trying to fly, but it may not succeed at first. After a few days, it should be able to manage some flight. At this point, it’s time for cage introduction. Set up one perch and a food dish at a low position in the cage, avoiding the use of a drop pan to prevent injury. Since the chick should still be receiving feed, a water dish isn’t necessary yet. Allow the chick to acclimate to the cage before adding a second perch and gradually raising the height of the perches.
During this period, flying can be exhausting, so it’s best to limit extended playtime.


Comments